note html

<!DOCTYPE html>
<html>
<head>
<style>
body {background-color:lightgrey}
h1   {color:blue}
p    {color:green}
</style>
</head>
<body>

<h1>This is a heading</h1>
<p>This is a paragraph.</p>

</body>
</html>
_________________________________________________________
<!DOCTYPE html>
<html>
<body>

<p><a href="html_images.asp">HTML Images</a> is a link to a page on this website.</p>

<p><a href="http://www.w3.org/">W3C</a> is a link to a website on the World Wide Web.</p>

</body>
</html>
____________________________________________________________
<!DOCTYPE html>
<html>
<body>

<p>The image is a link. You can click on it.</p>

<a href="default.asp">
  <img src="smiley.gif" alt="HTML tutorial" style="width:42px;height:42px;border:0">
</a>

<p>We have added "border:0" to prevent IE9 (and earlier) from displaying a border around the image.</p>

</body>
</html>
________________________________________________________________-
<!DOCTYPE html>
<html>
<body>

<h2>Spectacular Mountain</h2>
<img src="pic_mountain.jpg" alt="Mountain View" style="width:304px;height:228px;">

</body>
</html>
______________________________________________________________________-
<!DOCTYPE html>
<html>
<body>

<form action="action_page.php">
  First name:<br>
  <input type="text" name="firstname" value="Mickey">
  <br>
  Last name:<br>
  <input type="text" name="lastname" value="Mouse">
  <br><br>
  <input type="submit" value="Submit">
</form>

<p>If you click the "Submit" button, the form-data will be sent to a page called "action_page.php".</p>

</body>
</html>
_____________________________________________________________________
The Method Attribute
The method attribute specifies the HTTP method (GET or POST) to be used when submitting the forms:

<form action="action_page.php" method="get">
or:

<form action="action_page.php" method="post">

You can use GET (the default method):

If the form submission is passive (like a search engine query), and without sensitive information.

When to Use POST?
You should use POST:

If the form is updating data, or includes sensitive information (password).

POST offers better security because the submitted data is not visible in the page address.

__________________________________________________________________________

<!DOCTYPE html>
<html>
<body>

<input type="button" onclick="alert('Hello World!')" value="Click Me!">

</body>
</html>
__________________________________________________________________________

Some of The Most Important SQL Commands

  • SELECT - extracts data from a database
  • UPDATE - updates data in a database
  • DELETE - deletes data from a database
  • INSERT INTO - inserts new data into a database
  • CREATE DATABASE - creates a new database
  • ALTER DATABASE - modifies a database
  • CREATE TABLE - creates a new table
  • ALTER TABLE - modifies a table
  • DROP TABLE - deletes a table
  • CREATE INDEX - creates an index (search key)
  • DROP INDEX - deletes an index

Remove Password on Windows 7

Today i will share to you what should do if user forgot their admin password for windows 7.

what should we have prepared windows 7 installer. example i use usb drive as portable windows 7.

follow step as below:


1. Boot windows 7 using yumi


2. Press shift key + F10 . this command to popup command prompt. 


3. Type notepad.exe. then hit Enter.


4. Go to bar choose File > Open.


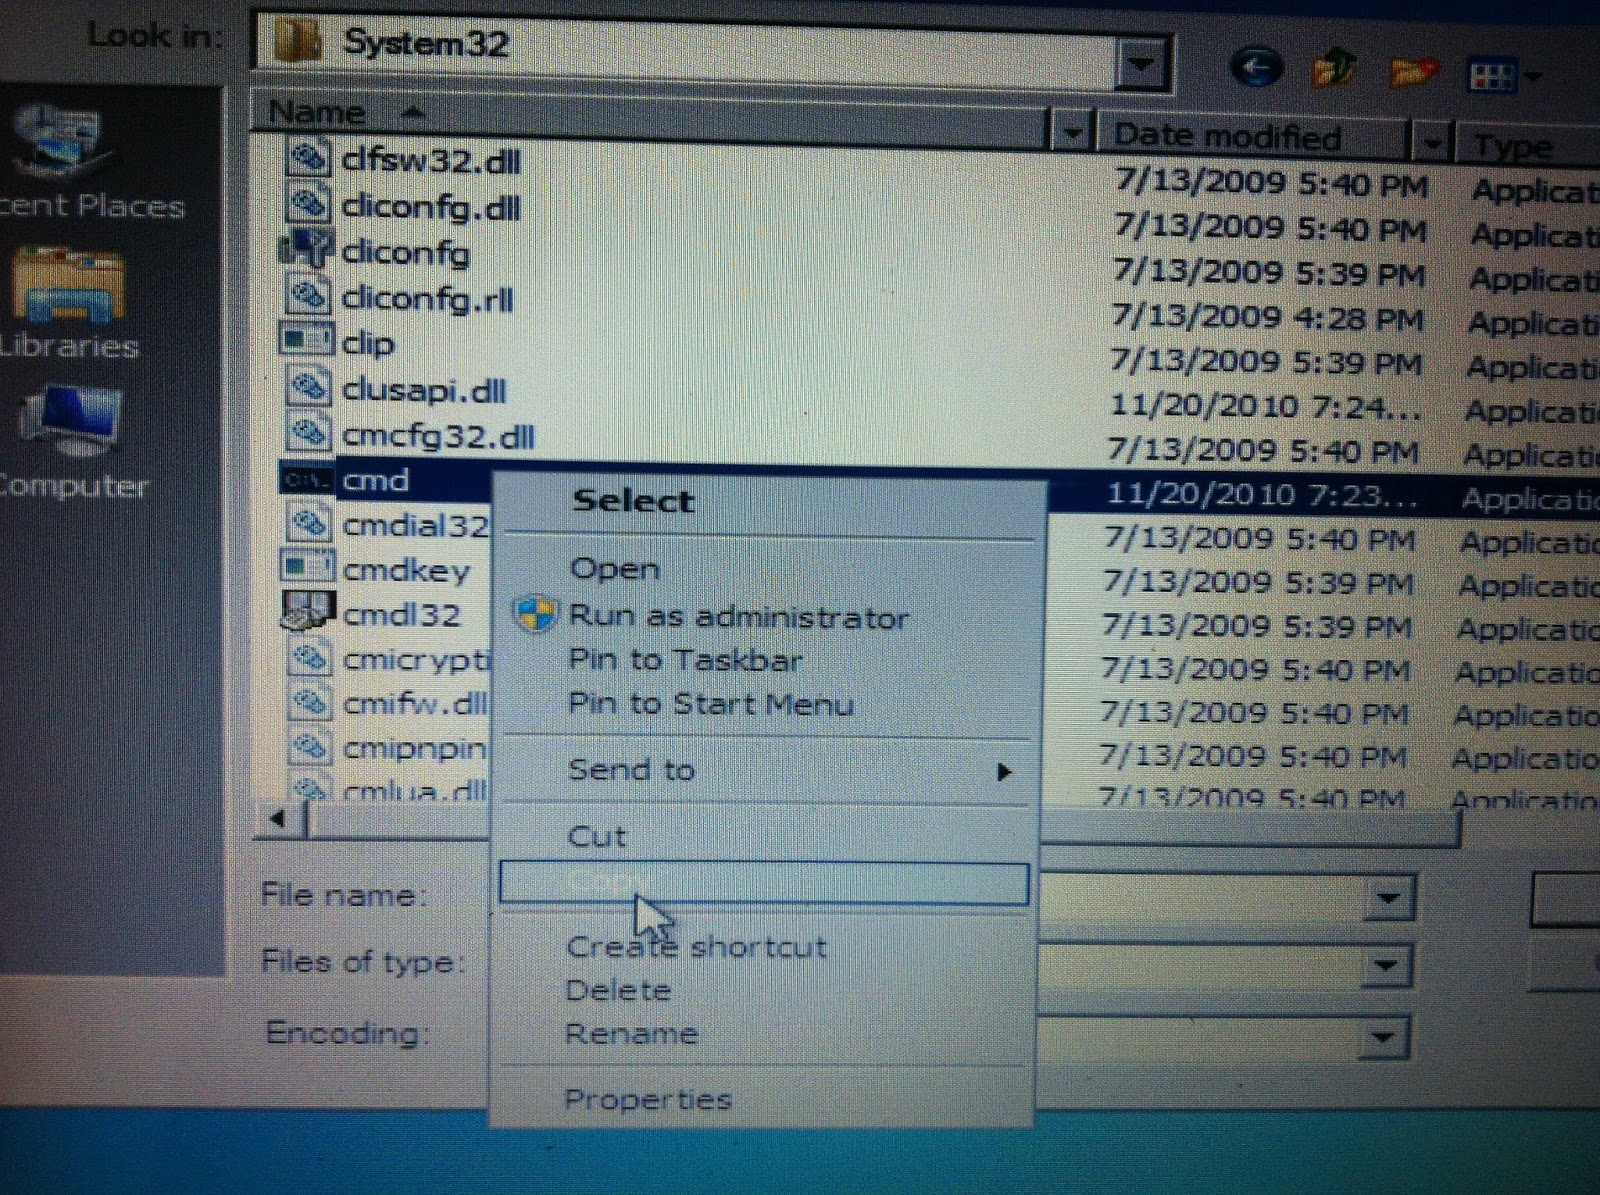
5. Enter in your optical drive to System32. Example: ACER(E:)>>Windows>>System32


6. Files of type : All Files


7. Find Utilman and rename to Utilmanold


8. Find cmd and copy&paste in same directory


9. Rename cmd to utilman


10. Close directory and cmd


11. Restart PC


12. After restart. Press Easy of Access.


13. Type net user


14. Choose account to unlock


15. Type net user user_acc_name *


16. Type new password 


17. Operation Successfully


18. Close cmd and login with new password


19. Done 


20. Thank you.


kali iso on yumi

macam mana nak masukkan kali os ke dalam pendrive menggunakan yumi

1. -alatan yang perlu disediakan
 >yumi
 >pendrive min 4gb
 >kali os

2.disable kan anti virus

3-masukkan pendrive

4-run yumi.exe


5-I Agree


6-select usb drive and thick "Format F:drive(Erese Content)?"


7-pilih iso distribution


8-pilih kat mana iso kali save


9-open


10-create


11-yes


12-running


13-next


14-no


15-finish

CONFIGURATION TEXT

access-list 1 permit 192.168.1.2 0.0.0.255
access-list 1 deny any


interface FastEthernet0/0
 no ip address
 duplex auto
 speed auto
!
interface FastEthernet0/0.1
 encapsulation dot1Q 10
 ip address 192.168.1.254 255.255.255.0
!
interface FastEthernet0/0.2
 encapsulation dot1Q 20
 ip address 192.168.2.254 255.255.255.0
!
interface FastEthernet0/1
 no ip address
 duplex auto
 speed auto
 shutdown
!
interface Serial0/0
 ip address 172.15.0.2 255.255.255.252
!


!
router rip
 network 172.15.0.0
 network 192.168.1.0
 network 192.168.2.0


access-list 1 permit 192.168.22.0 0.0.0.255
access-list 1 deny any

access-list 2 permit any
access-list 2 permit 192.168.10.0 0.0.0.255

interface FastEthernet0/2
 switchport access vlan 10
 switchport mode access

interface FastEthernet0/24
 switchport access vlan 20
 switchport mode access

interface FastEthernet0/1
 switchport mode trunk


interface FastEthernet0/0.10
 encapsulation dot1Q 10
 ip address 192.168.1.1 255.255.255.0
!
interface FastEthernet0/0.20
 encapsulation dot1Q 20
 ip address 192.168.2.1 255.255.255.0
!


interface FastEthernet0/0.10
 encapsulation dot1Q 10
 ip address 192.168.3.1 255.255.255.0
!
interface FastEthernet0/0.20
 encapsulation dot1Q 20
 ip address 192.168.4.1 255.255.255.0


router ospf 100
 log-adjacency-changes
 network 192.168.1.0 0.0.0.255 area 0
 network 172.16.0.0 0.0.0.0 area 0


hostname R2
!
ip cef
!
ip vrf BLUE
 description Trusted Traffic
!
ip vrf RED
 description Guest Traffic

interface Serial0/0/0 >>ubah kepada serial
 description R3
 no ip address
 duplex auto
 speed auto
!
interface Serial0/0/0.10 >>ubah kepada serial
 encapsulation dot1Q 10
 ip vrf forwarding BLUE
 ip address 10.0.23.1 255.255.255.252
!
interface Serial0/0/0.20
 encapsulation dot1Q 20
 ip vrf forwarding RED
 ip address 192.168.23.1 255.255.255.252
!
interface FastEthernet0/0 >>ubah kepada fa0/0
 description S1
 no ip address
 duplex auto
 speed auto
!
interface FastEthernet0/0.10
 encapsulation dot1Q 10
 ip vrf forwarding BLUE
 ip address 10.0.1.1 255.255.255.0
!
interface FastEthernet0/0.20
 encapsulation dot1Q 20
 ip vrf forwarding RED
 ip address 192.168.1.1 255.255.255.0
!
router ospf 1 vrf BLUE
 router-id 0.0.2.1
 log-adjacency-changes
 network 10.0.0.0 0.0.255.255 area 0
!
router ospf 2 vrf RED
 router-id 0.0.2.2
 log-adjacency-changes
 network 192.168.0.0 0.0.255.255 area 0
!
end

CONFIGURATION ON CISCO ROUTER

HOW TO CONFIGURE CISCO ROUTER

Make coonection from pc to router using console cable


 Connect using putty or hyperterminal


>>setup ip and force to up for interface fa0/0
Command
Router#configure terminal
Enter configuration commands, one per line.  End with CNTL/Z.
Router(config)#interface fa0/0 *
Router(config-if)#ip address 172.16.1.1 255.255.255.0
Router(config-if)#no shutdown
Router(config-if)#exit
Router(config)#exit
Router#copy run start
Destination filename [startup-config]?
Building configuration...
[OK]


·         *insert yourinterface port ether fa0/1, s0/1, s0/0

Do routing protocols for router
What is Routing Protocols?
A routing protocol specifies how routers communicate with each other, disseminating information that enables them to select routes between any two nodes on a computer network. Routing algorithms determine the specific choice of route. Each router has a priori knowledge only of networks attached to it directly. A routing protocol shares this information first among immediate neighbors, and then throughout the network. This way, routers gain knowledge of the topology of the network.


Routing Protocols : OSPF, EIGRP, RIP
Command:
Router>ena
Router#config t
Enter configuration commands, one per line.  End with CNTL/Z.
Router(config)#router eigrp* 1
Router(config-router)#network 172.16.0.0
Router(config-router)#network 172.10.0.0
Router(config-router)#network 192.168.3.0
Router(config-router)#no auto-summary
Router#copy run start
Destination filename [startup-config]?
Building configuration...
[OK]

·         *ospf/rip


*TO BE CONTINUE ACL


CISCO 2600 BACKUP AND RESTORE IOS

HOW TO BACKUP IOS CISCO ROUTER 2600
USING TFTP SERVER

      1.       Instal tftp server


2.       Edit configuration file
C:\OpenTFTPServer/OpenTFTPServerMT.ini


3.       Uncomment and edit
Before
After
‘write=N
Write=Y
‘Overwrite=N
Overite=Y


4. Save
>>Run OpenTFTP Server


5. Connect cross cable from port fa0/0 on router to network card on pc.
Change ip on pc to static ip


6. Connect console from router to pc. Using hyperterminal to access into router


7. Open file goto new connection


8. Insert name and choose icon


9. Select connection.. like me use COM1.

10. Choose speend rate. It important when use tftp server to transfer ios from server to your router.


11. Now you are connected to your router


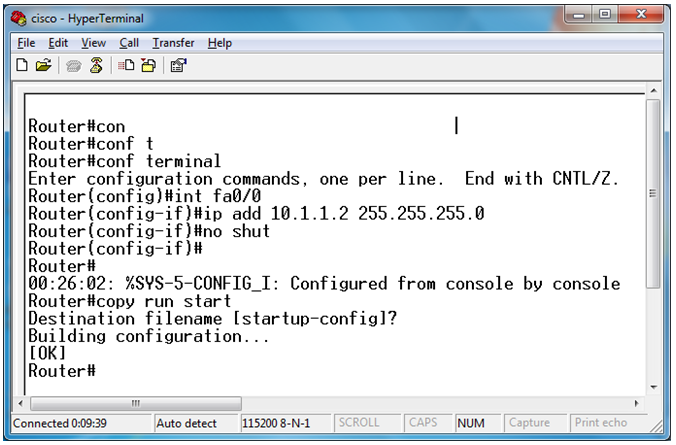
12. Set ip address for port fa0/0.
>>Router#configure terminal
>>Enter configuration commands, one per line.  End with CNTL/Z.
>>Router(config)#interface fastEthernet 0/0
>>Router(config-if)#ip address 10.1.1.2 255.255.255.0
>>Router(config-if)#no shutdown


13. Test connection


14. Check flash file


15. Copy flash file to tftp server


16. Check file on tftp server folder
>>C:\OpenTFTPServer


17. DONE TO TRANFER FLASH TO TFTP SERVER


HOW TO RESTORE FLASH TO CISCO 2600 ROUTER

1. Check cable are connected
2. Run tftp server (see above)
3. Open hyperterminal (see above)
>>Set ip address on router
               Rommon 1>IP_ADDRESS=10.1.1.2
               Rommon2>IP_SUBNET_MASK=255.255.255.0

               Rommon3>DEFAULT_GATEWAY=

(IF TFTP SERVER AT OUTSIDE NETWORK RANGE, YOU MUST SET GATEWAY. LIKE ME,  MY TFTP SERVER IN THE SAME RANGE OF NETWORK SO DONT NEED TO PUT GATEWAY)
               Rommon4>TFTP_SERVER=10.1.1.1  <<YOUR IP SERVER
               Rommon5>TFTP_FILE=c2600-d-mz.122-13b.bin <<file name have to move
              
               Rommon6>tftpdnld –r
(when hit the enter, file from server will move to your router. Wait the file finish to finish transfer.)

Done transfer


4. Set ip address
Router>enable
Router#configure terminal
Enter configuration commands, one per line.  End with CNTL/Z.
Router(config)#int fa0/0
Router(config-if)#ip add 10.1.1.2 255.255.255.0
Router(config-if)#no shut
Router(config-if)#
(if server at outside range of network,you must configure ip route)


6. Copy tftp flash from server


7. Reload


 8. DONE!!!! ;)